React Native WebView Guide - build mobile app from existing web app


Creating a dedicated mobile app is a demanding task, both on the resource and time fronts. However, some alternatives allow us to use our current web page, like Capacitor and React Native WebView.
Today, we will focus on the latter. We will learn how to use the React Native WebView component, how to implement common features that are used in mobile applications, and everything that while using Expo.
What is React Native WebView?
React Native WebView is a node package that introduces a WebView component that allows developers to display web content seamlessly within a React Native application. Earlier, the component was part of React Native, but now it's its package and is community-driven. The project currently supports iOS, Android, Windows, and MacOS.
When to use the React Native WebView
- You have a web app created and the app is developed in a mobile-first manner or has been adapted to work on small screens. The app has to be responsive and should feel like a mobile app.
The app has been designed to work with touchscreens:
- interactive elements, such as links and buttons, are appropriately sized,
- touch gestures are implemented, e.g., an image carousel works with sliding,
- suitable navigation (bottom bars, expandable sidebars, hamburger menus, etc.).
- You need to have a mobile app NOW. React Native WebView allows one to practically reuse the whole codebase with only minimal changes.
WebView can have multiple advantages over a native app. Firstly deploying a new version is as simple as pushing an update to the web app. User experience is consistent across platforms. Developing only one version of the app is cost-efficient and allows for faster iterations.
When to create a dedicated mobile app
- When the currently developed web app isn't very convoluted, it is a good idea to create a dedicated mobile app before the app becomes one. In my
- There are no time and resource constraints, a dedicated mobile app will be a lot faster and easier to expand in the future. Creating a mobile app to be equivalent to a big web app is VERY time-consuming.
- The app needs to access the mobile device features. When the main feature of the app is, e.g., GPS - a dedicated mobile app allows for a more seamless experience.
- One of the requirements for the mobile app is to follow a platform-specific design. Android and iOS have their design systems.
Getting started
After getting our React Native project with Expo up and running, install the package using Expo's installer. It's important to use expo install because it will pick a version of the library that is compatible with our project.
npx expo install react-native-webviewDisplay our web application
The first thing is to import the React Native WebView component and use it in our React Native app:
import { WebView } from 'react-native-webview';

export function MyWebView() {
  return <WebView />;
}
Next, we have to specify the source prop. The prop is an object that can take:
uri- URI to the web page that we want to display,method- the HTTP method to use, default is GET and the only supported are GET and POST,headers- additional HTTP headers to send with the request,body- additional HTTP body to send with the request.
source={{ uri: "https://example.com" }}And that's it :), if our web page doesn't behave properly take a look at the next section.
The component also allows to set custom static HTML instead of URI.
Enable JavaScript
Most applications need JavaScript code to work properly. To enable JavaScript add javaScriptEnabled property to the component. Remember to only enable JS for trusted websites but I guess that our app is trusted.
javaScriptEnabled={true}As we are here, it's a good idea to enable DOM storage (used only in Android). Without this, our app will probably not work properly. To enable DOM storage, add domStorageEnabled props to the component.
domStorageEnabled={true}Security concerns
The React Native WebView component has several props that allow us to control the behavior of the component, regarding security. The first one is originWhitelist, this prop is a list of strings that represent origins that the WebView can display. The strings allow wildcards: ***. If a user navigates to a new page but the origin of the page isn't in this allowlist, the URL will be handled by the OS.
originWhitelist={["https://*"]}The next prop is mixedContentMode, this prop is a string and tells the React Native WebView how to handle mixed content. Mixed content is
- content that is, e.g., fetched or is an image from the
imgtag, - source of the content is from an HTTP source instead of a secure one (HTTPS).
Possible values of the mixedContentMode prop:
never- WebView will not allow to load insecure web content from a secure origin,always- WebView will allow to load insecure web content from any other origin,compatibility- WebView will attempt to be compatible with the approach of a modern web browser.
If we are sure that our app will always load web content from a secure origin we can set the prop to never.
mixedContentMode="never"The last notable prop is incognito, this is the same as the incognito mode in web browsers. If set to true, the React Native WebView will not store any data.
incognito={true}A word of caution to never set setSupportMultipleWindows to false. After setting it to false the WebView component will be exposed to this vulnerability, which allows a malicious iframe to escape into the top layer DOM.
Properly set the position of the React Native WebView
Our app is probably under the status bar right now. React Native provides a SafeAreaView component, which positions the WebView correctly but only on iOS, from my testing. The react-native-safe-area-context package provides the same named component that only works on Android, so we can use both of them.
import { Platform, StyleSheet, SafeAreaView as SafeAreaViewIOS } from "react-native";
import { SafeAreaView as SafeAreaViewAndroid } from "react-native-safe-area-context";
import { StatusBar } from "expo-status-bar";

const styles = StyleSheet.create({
  appView: {
    flex: 1,
  },
});

const WebviewWrapper = ({ children }) => {
  const isIOS = Platform.OS === "ios";
  const SafeAreaView = isIOS ? SafeAreaViewIOS : SafeAreaViewAndroid;

  return (
    <SafeAreaView style={[styles.appView]}>
      <StatusBar hidden={false} />
      {children}
    </SafeAreaView>
  );
};
...
<WebviewWrapper>
  <WebView />
</WebviewWrapper>
Communication between the web app and the React Native application
There are times when we want to establish a connection between our web app and the React Native project. The React Native WebView project's authors predicted that and implemented two-way communication. To handle communication from the native environment to the web using the following props:
injectedJavaScript- injects given javascript code into the page after the document finishes loading,injectedJavaScriptBeforeContentLoaded- injects given javascript code into the page after the document is created,injectedJavaScriptObject- injects given object into aReactNativeWebViewobject, it works only on Android,onMessage- a callback that is invoked when a page in the WebView callswindow.ReactNativeWebView.postMessage. The callback accepts one argument, which is a string.
The WebView component appends the ReactNativeWebView object to the window object in the web app. This object contains:
injectedObjectJson- a function that returns a string from the object injected using theinjectedJavaScriptObjectprop,postMessage- a function that sends a given string to theonMessagecallback on the WebView component.
WebView allows injecting JavaScript code on demand using the injectJavaScript method.
import { useRef } from "react";
import { WebView } from "react-native-webview";

export function MyWebView() {
  const webViewRef = useRef()

  const injectCustomJavascript = () => {
    webViewRef.current?.injectJavaScript(`
      document.body.style.backgroundColor = 'lightgray';
      true;
    `);
  }

  return <WebView ref={webViewRef} />;
}
Expand our app to handle React Native WebView
One problem that arises when dealing with WebViews is how the web app knows it is rendered in a WebView. The simplest option is to put an object with needed information into the injectedJavaScriptObject or just inject window.isNativeApp = true using the injectedJavaScriptBeforeContentLoaded prop. This has its drawbacks, when the web app is rendered on a server, the server doesn't know about that. The injected object or code is only known to the client. There are two better options: one is to set a custom user agent, and the second is to set a cookie or header with the needed information. We can set a custom user agent using a userAgent prop.
userAgent={`webview-${Platform.OS === "ios" ? "ios" : "android"}`}Common mobile features
Show loading indicator
If we want to show a loading screen instead of watching the whole process of loading the page, then WebView has our back. The first thing we have to do is to set a startInLoadingState prop to true. This allows a renderLoading prop to work, and we can now put our desired component into the prop.
startInLoadingState={true}
renderLoading={() => <div>Loading...</div>}
Show splash screen while loading
Instead of showing a loading screen, we can display a custom splash screen. This way, we can not only handle the loading of the React Native WebView but also everything we have to load in the native app. We are going to use Expo's SplashScreen SDK.
npx expo install expo-splash-screenThe first thing is that we have to invoke a preventAutoHideAsync function outside the main component. This function will keep the splash screen visible until we decide to hide it. To hide the splash screen use a hideAsync function.
import * as SplashScreen from 'expo-splash-screen';

SplashScreen.preventAutoHideAsync();

export default function App { ... }
The next step is to create a state and change that state using an onLoadEnd callback. In the example, I'm using setTimeout to delay removing the splash screen to avoid flickering, which can sometimes occur.
export default function App {
  const [loading, setLoading] = useState(true);

  useEffect(() => {
    if (loading) return;
    const timer = setTimeout(async() => {
      await SplashScreen.hideAsync();
    }, 200);

    return () => clearTimeout(timer);
  }, [loading]);

  return <WebView
    onLoadEnd={() => setLoading(false)}
  />;
}
Handle navigation gestures and back button
Navigation gestures are iOS' features, that allow us to go back or forward using horizontal swipes. To enable gestures use a allowsBackForwardNavigationGestures prop.
allowsBackForwardNavigationGestures={true}We can provide support for Android's gestures and back button by using BackHandler. We have to hook up a goBack method to the BackHandler's event listener.
import { BackHandler } from "react-native";
...
const webViewRef = useRef(null);

useEffect(() => {
  if (Platform.OS === "ios") return;

  const handleBack = () => {
    if (!webViewRef.current) return false;
    webViewRef.current.goBack();
    return true;
  };

  const handleEvent = BackHandler.addEventListener(
    "hardwareBackPress",
    handleBack
  );
  return () => handleEvent.remove();
}, []);

<WebView ref={webViewRef} />
Display external web pages using the system's integrated browser
We don't want to display external web pages in the React Native WebView, we should display these pages using the system's browser, as all the apps do. We are going to use Expo's WebBrowser SDK. To display any page in the system's browser, use the openBrowserAsync function.
npx expo install expo-web-browserTo intercept the loading of external URLs, we have to use the onShouldStartLoadWithRequest callback. This callback is run every time a user changes the page. The first argument of the callback receives an object that contains a url attribute. With this, we can check if the request is for our website or not. To stop the request, return false from the callback, and to proceed, return true.
import * as WebBrowser from "expo-web-browser";
...
onShouldStartLoadWithRequest={({ url }) => {
  if (url.startsWith("https://example.com")) return true;
  WebBrowser.openBrowserAsync(url);
  return false;
}}
Pull to refresh
WebView supports pull to refresh out of the box with a pullToRefreshEnabled prop, but this will probably be a little junky, depending on our app. I suggest you implement PTR in the web app using e.g. react-simple-pull-to-refresh package.
pullToRefreshEnabled={true}Download files
File downloading is supported out of the box on Android, but on iOS we have to supply an onFileDownload callback to the WebView component. From my own experience, this only works when a response has a Content-Disposition: attachment header.
import { Linking } from "react-native";
...
onFileDownload={({ nativeEvent: { downloadUrl } }) => {
  // This will open the file in a default browser
  if (downloadUrl) Linking.openURL(downloadUrl);
}}
There is a second option - send a message, using postMessage from the web app, with the file's base64 data and save it using Expo's FileSystem and Sharing SDKs.
npx expo install expo-file-system expo-sharingAfter sending the required data via postMessage and parsing it in an onMessage callback, it's time to save it.
import * as FileSystem from "expo-file-system";
import * as Sharing from "expo-sharing";

const handleDownloadBase64 = async ({ filename, data }) => {
  // When the filename contains spaces the process will fail
  const fileUri = `${FileSystem.documentDirectory}/${filename.replace(
    / /g,
    "_"
  )}`;

  await FileSystem.writeAsStringAsync(fileUri, data, {
    encoding: FileSystem.EncodingType.Base64,
  });
  Sharing.shareAsync(fileUri);
}
...
onMessage={async ({ nativeEvent }) => {
  const { data } = nativeEvent;
  const parsedData = JSON.parse(data);
  await handleDownloadBase64(parsedData);
}}
Upload files from the native app
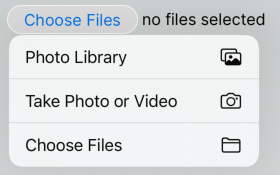
Uploading files using the input tag is supported out of the box. When the input indicates that video or images are desired with the accept attribute then the WebView will attempt to provide options to the user to use their camera.
<input type="file" />
Handle the React Native WebView's cookies
The current situation with cookie persistence after closing the native app isn't perfect. Sometimes it works, and sometimes it doesn't, depending on the OS. To handle cookies "by hand" we will use the @react-native-cookies/cookies package. Unfortunately, this package doesn't work with Expo Go.
npx expo install @react-native-cookies/cookies expo-deviceCookies on Android
The cookie situation is fairly straightforward. The only thing we have to do is to listen to the app state and flush cookies when it changes and cookies will work properly.
import { AppState } from "react-native";
import CookieManager, { Cookie } from "@react-native-cookies/cookies";
...
useEffect(() => {
  if (Platform.OS !== "android" || !Device.isDevice) return;
  const flushCookies = () => CookieManager.flush();
  const event = AppState.addEventListener("change", flushCookies);

  return () => event.remove();
}, []);
Cookies on iOS
Unfortunately, on iOS the situation is worse. We have to save cookies to external storage, which of course isn't perfect. In this example, I will use @react-native-async-storage/async-storage package.
npx expo install @react-native-async-storage/async-storageWe have to create a state that will display the WebView only after cookies have been set.
const [isReady, setIsReady] = useState(false);

// Save cookies on iOS
useEffect(() => {
  if (Platform.OS !== "ios" || !Device.isDevice) return;
  const saveCookies = async () => {
    const cookies = await CookieManager.get("https://example.com", true);
    AsyncStorage.setItem("cookies", JSON.stringify(cookies));
  };
  const event = AppState.addEventListener("change", saveCookies);
  return () => event.remove();
}, []);

// Load cookies on iOS
useEffect(() => {
  if (Platform.OS !== "ios") return setIsReady(true);
  (async () => {
    const cookiesString = await AsyncStorage.getItem("cookies");
    const cookies: Cookies = JSON.parse(cookiesString || "{}");
    Object.values(cookies).forEach((cookie) => {
      CookieManager.set("https://example.com", cookie, true);
    });

    setIsReady(true);
  })();
}, []);

if (!isReady) return null;

return <WebView />
Links
Want a stunning mobile app built with React Native?
Related posts
Dive deeper into this topic with these related posts
You might also like
Discover more content from this category
Mobile Push notifications are a feature of modern mobile systems that allow applications to notify users of new messages, updates, or other information, even when the user is not actively using the app.
Mobile app development has been on the rise in recent years, with more and more businesses and developers recognizing the importance of having a presence on mobile devices.
React Native has become a popular platform for developing mobile apps due to its versatility and ability to create native apps for both Android and iOS platforms using a single codebase.


